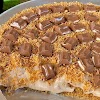
Florence biscuit recipe without eggs
the components:
1/3 cup (80 g) is not salted butter
1/4 cup (60 g) light brown sugar, packed
1/4 cup (60 g) honey
1/2 cup (60 g) for all purposes
1/4 teaspoon salt
1 cup (100 g) chopped almond
1/3 cup (50 g) dried fruit mixed, chopped, smooth, soft (such as cherry, cranberry and apricot)
1/2 teaspoon vanilla extract
4 ounces (115 grams) dark chocolate or milk (for paint)
Instructions:
Step 1: Preparing the oven and baking sheet
Heat the oven to 350 ° F (175 ° C).
Describe a baking sheet with a manuscript paper or silicone bread mat.
Step 2: Make a fluorine mixture
In a medium sauce, melt the butter, brown sugar and honey on medium heat, stirring until it is blessed.
Remove the heat, add flour and salt, stirring until fully merged.
Add almonds, dried fruits and vanilla extract. Stir to merge all the ingredients evenly.
Step 3: The form of biscuits
A round teaspoon script of the mixture on the stomach baking sheet, and about 2 inches separated them to allow the spread.
Each hill flattens with a spoon back.
Step 4: Bread
Bake for 8-10 minutes, or until the edges are golden brown and determine the centers.
Remove the biscuit from the oven and let the biscuit cool on the baking sheet for a few minutes, then transfer it to a wire shelf to cool completely.
Step 5: Chocolate coat
Leave chocolate in an anti -heat bowl over a bowl of boiling water, or in the microwave in short explosions.
Once the biscuit is completely cooled, spread or dip one side of each biscuit in melted chocolate, smooth it with a spoon if necessary.
Place the biscuit, and the side of the chocolate up, on a sheet of paper to allow to put the chocolate.
Step 6: Service and enjoy
Once the chocolate harden, your fluorescent biscuit becomes ready to serve it.
advice:
Storage: Storage in the air tight container for up to a week. Keep a cool place to prevent chocolate from melting.
Various shapes: Try adding chopped hazelnuts, pistachios, or white spray chocolate over it for additional decoration.
Enjoy this fluorine biscuit with its perfect balance of crunchy, chewing and chocolate perfume!


0 Comments